

 These days, I'm smitten with all the clever tattoos out there, but I'm too wussy to get a permanent one. So I was THRILLED to discover tatt.ly, a new online shop offering awesome, designy temporary tattoos.
Which would you wear?
These days, I'm smitten with all the clever tattoos out there, but I'm too wussy to get a permanent one. So I was THRILLED to discover tatt.ly, a new online shop offering awesome, designy temporary tattoos.
 Oh my goodness, how gorgeous are these dramatic eyebrows? When I saw these stunning photos of Oscar de la Renta's recent runway show, my jaw dropped. Makeup artists often insist that eyebrows are the most important part of your look, since they frame your face and can make your eyes look bigger and make your face look younger. Wouldn't you love to recreate these sexy bold brows for a night out?
 As summer approaches, I usually get a little shy about wearing shorts and exposing my so-white-they're-almost-blue legs. When I was in college, I even went fake tanning (yikes!) and slathered on orange self-tanner (not a good look).


 Although I'm not a tattoo girl myself, I'm loving these clever and charming tattoos. What do you think?
 My dears, I'm excited to share our second wedding hair tutorial! My friend (and hair genius) Caroline adores this elegant twisted roll--and swears it's easy enough for brides to do themselves. So, we met at my favorite West Village wedding shop, and the wonderful Jamie Beck took photographs. Doesn't her hair look straight from the 1940's? So romantic.

 This hairstyle is perfect for a black-tie wedding or to show off a pretty neckline--and it's great for girls with curly hair. It's super easy; I promise with the teensiest bit of practice, you'll be able to do it in less than five minutes!


 Voila! Isn't it beautiful? Would you consider this wedding look? If you're already married, how did you wear your hair at your wedding? xo
 I used to be so sleepy at the end of the night that I'd skip washing my face and just tumble into bed. But then a friend recommended these cucumber towelettes, and, I have to say, they've totally improved my bedtime routine. You just wipe your face (no water required), and they remove makeup, moisturize skin, smell amazing, and make you feel fresh and revitalized.
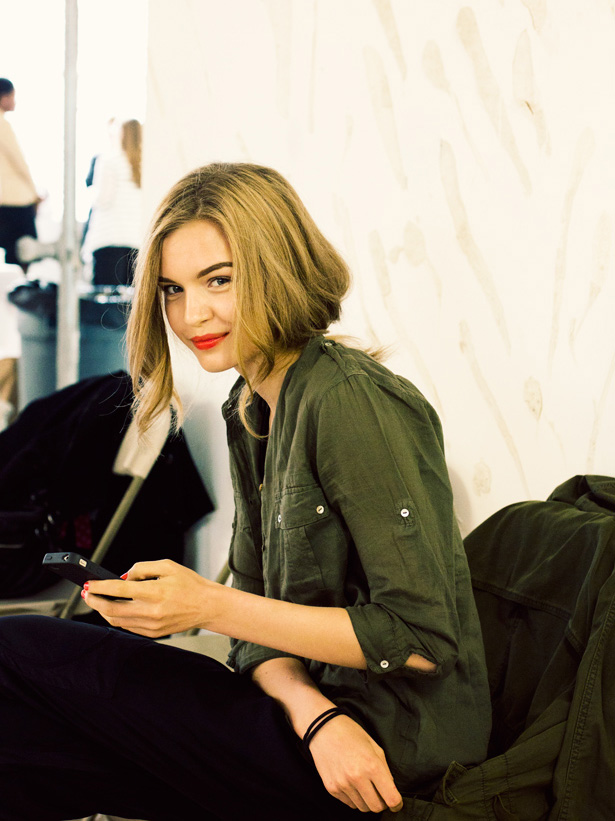
 Toby and I went on a walk early this morning and spotted this beautiful lilac nail polish on two different gorgeous women. (Maybe it's the new "it" color?) It looked so light and lovely, and was a nice change from red and pink. I'm going to pick up a bottle today and plan to wear it all summer. What do you think? xo
 When I got married, I never would have thought of doing my own wedding hair, but my friend (and hair genius) Caroline swore this beautiful chestnut bun was simple enough for brides to do themselves. So, I invited her to a West Village wedding shop to explain the steps (and play dress up), and the wonderful Jamie Beck took photographs. Doesn't the elegant bun look like something Grace Kelly would wear? Would you wear it?
 1. Gather your hair into a high ponytail and secure it with a rubber band. You want the band to be pretty tight (otherwise the sides of the ponytail will droop after you do step three).


 Voila, that's it! What do you think, my dears? Would you do your own wedding hair? Isn't this surprisingly simple? xo Thank you, Jamie and Caroline! And most of all, congratulations to all you brides-to-be out there!
 P.S. More hair tutorials...
 Refinery29 just wrote about the six coolest nail polish trends, and I'd love to try baby blue and very, very pale pink (I actually wore this exact pink at our wedding). Wouldn't they look pretty peeking out of sandals?
 I'm excited to share another hair tutorial! Heidi braids, which go across the top of your head, are beautiful, but my friend Caroline wears hers in a different way: like a crown circling around her head. What a breezy summer style! She looks like a Danish princess. So I invited her over to explain how to do them, and the wonderful Jamie Beck took photographs.

 1. First, part your hair into two sections. To make the look softer, I like to make a diagonal part in the front (starting sort of near the arch of my left eyebrow, going towards the middle of the crown) and then bring the part straight down the back.
 What do you think, my darlings? These pretty braids are perfect for summer bike rides and taking photos around town. (Your hair stays out of your face, but you still look adorable.) Thank you so much, Caroline and Jamie. xoxo
 My friend Leigh always has pretty nail polish, but my jaw dropped when I saw her glittery gold manicure. They're actually Sally Hansen nail strips, which you apply like stickers! So they never smudge and don't need drying time. Aren't they amazing?


 How pretty are these heidi braids from the Rachel Roy fall 2011 show? Refinery 29 just did a great tutorial. (And it would be cute with the new heart scarf from ban.do.)
 My friend Alison came over yesterday and smelled like a field of wild roses and pink peonies. Her secret? Chloe Chloe perfume. The scent was light, romantic and just perfect. I'm going to head over to Sephora and pick up this little rollerball version today.
 Whenever I'm walking around downtown New York, I see tons of cute girls wearing buns on the tops of their heads. Well, what could be even better than a top bun? A braided top bun! My friend Caroline, a hair genius, came over to explain exactly how to get this easy spring look, and the fabulous Jamie Beck took photos.
 1. This simple hairstyle is perfect for a warm spring day, when you want to keep your hair cool and off your neck. First, part your hair in a deep side part (instead of combing it back smoothly). This makes it look a little less fancy, perfect for bike rides or Sunday picnics. Then gather your hair into a ponytail on top of your head. The higher, the better.
  Voila! Here's the look, beautiful and timeless. What do you think, my darlings? Thank you so much, Caroline and Jamie! xoxo
 I'm excited to share another hair tutorial! You know those days when you want your hair to look pretty but you only have a minute? Well, my friend Caroline swears by this gorgeous set of three twisted buns ("like cinnamon rolls!" she says). So she came over to explain exactly how to do them, and the wonderful Jamie Beck took a few photographs. And guess what? They really were quick and easy.

 Here's the look, feminine and easy breezy. What do you think, my darlings? Thank you so much, Caroline and Jamie! xoxoxo